Choosing the right conservatory roof company comes down to five things: verified credentials, credible reviews, proof of past work, solid warranties and transparent quotes. This guide walks you through each one – so you can hire with confidence and avoid costly mistakes.
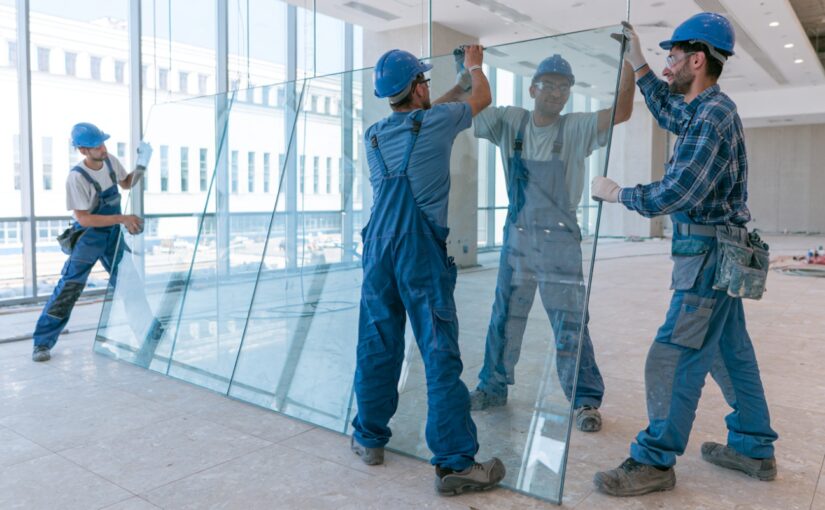
Replacing a conservatory roof is one of the more significant home investments you’ll make. Costs can run from a few thousand pounds to well over £18,000, depending on the material and size of your conservatory. That’s not a decision you want to get wrong.
The good news is that finding a company you can trust doesn’t need to be overwhelming. Most homeowners focus on price first – but the companies that deliver the best results are the ones that can also demonstrate their credentials, stand behind their work and communicate clearly from the first phone call.
This guide gives you a practical framework for evaluating conservatory roof companies before you commit. You’ll know exactly what to look for, what to ask and what warning signs to walk away from.
What Makes a Conservatory Roof Company Trustworthy?
Trust isn’t a feeling – it’s a set of verifiable signals. Here’s what to look for when assessing any conservatory roof company.
Relevant accreditations and scheme membership
Accreditations don’t guarantee perfect work, but they do confirm that a company has been assessed against a recognised standard. For conservatory roof work, look for:
- TrustMark registration – TrustMark is the Government Endorsed Quality Scheme covering work carried out in or around your home. Registered businesses are vetted for technical skills, customer service and trading practices and they’re monitored on an ongoing basis. The TrustMark team also recommends getting three written, itemised quotes and using a written contract before any work begins.
- Trade association membership – Bodies such as the Glass and Glazing Federation (GGF) or the National Association of Roofline, Cladding and Coping (NARCL) have codes of conduct that members must follow.
- FENSA registration (for glazing elements) – FENSA covers replacement windows, rooflights and doors, but it does not cover conservatory installations directly. If a company claims FENSA certification covers the whole conservatory roof project, that’s worth clarifying. For conservatories, any issue would need to be taken up with the relevant trade association, not FENSA itself (FENSA).
Transparent pricing and clear communication
A trustworthy company gives you a fixed quote, not just a rough estimate. There’s an important difference: a quote is a legal commitment to deliver at that price, while an estimate is a best guess that can change. According to Citizens Advice, you should always request a written quote that includes a total fixed price, a full breakdown of materials and labour, VAT details and a validity period.
Pay attention to how a company communicates before you hire them. Do they answer questions directly? Do they explain what’s included and what isn’t? Clear, confident communication at the quote stage is usually a good sign for the project itself.
Building regulations awareness
If you’re replacing a translucent or polycarbonate roof with a solid, insulated alternative, you’ll need building regulations approval. This isn’t optional. Building Control will assess whether your existing conservatory structure can support the increased load – checking foundations, door and window supports and structural stability. A reputable company’s surveyor will carry out this assessment before any work starts (All Seasons Roof).
Any company that doesn’t raise building regulations during the sales conversation – or worse, suggests you don’t need them – is a red flag.
How to Assess Conservatory Roof Company Reviews
Online reviews are one of your most useful research tools, but only if you know how to read them correctly.
Where to look for reliable reviews
Use platforms where reviews are independently verified or tied to confirmed purchases. Good options include:
- Checkatrade – Reviews are collected directly from customers after jobs are completed and verified by the platform
- Trustpilot – Large volume of reviews, though verification varies; look for responses from the business
- Google Reviews – Useful for volume and recency; useful alongside other platforms
- Which? Trusted Traders – Endorsement scheme with editorial vetting
Avoid placing too much weight on reviews displayed only on a company’s own website. You have no way to verify these haven’t been selectively published.
Spotting suspicious review patterns
The UK Competition and Markets Authority (CMA) issued guidance in April 2025 confirming that fake and misleading reviews are now explicitly prohibited under the Digital Markets, Competition and Consumers Act 2024 (CMA, 2025). That doesn’t mean they’ve disappeared.
Watch for these warning signs:
- A sudden spike in five-star reviews over a short period, with few reviews before or after
- Generic language that doesn’t describe a specific job (“”great service, would recommend!””)
- No negative reviews at all – even excellent companies occasionally receive criticism
- Reviewer accounts with no history beyond a single review for that business
A company with 60 reviews averaging 4.6 stars – including a handful of constructive three-star ones that the business responded to – is far more credible than one with 200 perfect five-star reviews and no variation.
What Proof Should You Request Before Hiring?
Don’t take a company’s word for their qualifications. Ask to see documentation and verify it.
Documents worth requesting
- Public liability insurance – Covers damage to your property or injury during the project. Ask to see the certificate and check the expiry date.
- Proof of trade scheme or accreditation membership – Cross-check with the relevant organisation’s own member search, not just the company’s badge on their website.
- Examples of previous work – Ideally, ask for references from two or three recent, similar projects. Contact those homeowners directly, as written references can’t always be verified.
Citizens Advice recommends checking all of the above before agreeing to any work – and being cautious of any company that’s reluctant to share these details (Citizens Advice).
What Should a Conservatory Roof Warranty Cover?
A good warranty is your safety net if something goes wrong after the job is done. Here’s what to look for.
The key elements of a solid warranty
- Duration – Industry standard for roofing work is typically 10 years, though this varies. Confirm the length before signing.
- What’s covered – The warranty should cover both materials and workmanship. A guarantee that only covers labour, for example, could leave you exposed if panels fail prematurely.
- Insurance-backed guarantee (IBG) – This ensures the warranty remains valid even if the company goes out of business. Without an IBG, a company closure effectively voids your warranty. FENSA notes that registered domestic glazing installers are legally required to provide warranty insurance for replacement glazing elements (FENSA).
Be wary of vague warranty language like “”guaranteed satisfaction”” without specific terms. Ask the company to explain exactly what the warranty covers and what would void it.
Quote Red Flags: Warning Signs to Watch For
Getting three or more written quotes is standard practice – but knowing how to compare them is just as important as getting them in the first place.
Red flags in quotes
- No itemised breakdown – A single lump-sum figure tells you nothing about what you’re actually paying for. You should be able to see materials, labour and any additional fees as separate line items.
- No mention of VAT – Ask whether the price includes VAT. A quote that excludes it can look significantly cheaper than it actually is.
- Cash-only payment requests – Reputable companies accept card or bank transfer. Cash-only arrangements offer you no consumer protection if something goes wrong.
- Pressure to sign immediately – Any company applying urgency (“”this price is only valid today””) is using a sales tactic, not a genuine deadline. You have a legal 14-day cooling-off period for contracts signed away from business premises.
- No building survey before quoting – For solid roof replacements especially, a reputable company should carry out a structural survey before pricing the job. A quote given without seeing the conservatory is not a reliable one.
- Verbal-only quotes – If it’s not in writing, it’s not a quote.
Comparison Table: Types of Conservatory Roof Replacement
| Roof Type | Typical Cost Range | Best For | Building Regs Needed? |
| Polycarbonate | £6,300 – £9,600 | Budget replacement; like-for-like swap | Usually no |
| Glass | £8,000 – £13,000+ | More light, better thermal performance than poly | Usually no |
| Solid / Insulated | £10,000 – £18,225+ | Year-round use, maximum thermal comfort | Yes |
Cost estimates based on Checkatrade’s 2026 UK price guide, which puts the average conservatory roof replacement at approximately £10,000 (Checkatrade).
Solid insulated roofs deliver the best thermal performance – keeping the space warm in winter and cooler in summer – but they require building regulations approval and a structural assessment. Polycarbonate is the most affordable option but offers the least insulation. Glass sits in the middle: better thermally than polycarbonate, with the added benefit of natural light.
How Much Does It Cost to Roof a Conservatory?
Quick answer: Conservatory roof replacement in the UK typically costs between £6,300 and £18,225+, with an average of around £10,000. The main factors affecting cost are the type of material, the size of the conservatory and whether structural work is needed (According to Checkatrade, 2026).
Here’s a more detailed breakdown of what affects your final cost:
- Material choice – Polycarbonate is the most affordable; solid insulated roofing is the most expensive
- Conservatory size – Larger footprints require more materials and longer installation time
- Structural requirements – If foundations or supports need reinforcing to carry a heavier solid roof, costs increase
Always ask for a like-for-like comparison when collecting multiple quotes. If one company includes scaffolding and another doesn’t, the prices aren’t comparable.