Office Furniture Layout Ideas to Improve Collaboration and Workflow

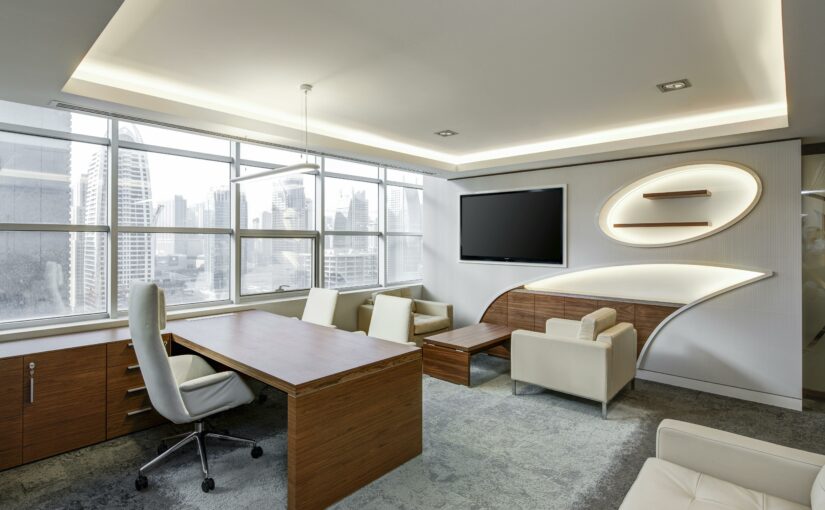
The design of an office is more than a matter of aesthetics—it’s a reflection of how a company operates, communicates, and grows. In today’s fast-paced business environment, collaboration and workflow are essential to success. Yet, many organizations overlook the role that business furniture west palm beach layout plays in shaping these dynamics. The arrangement of desks, meeting areas, and communal spaces can either foster seamless interaction or create barriers to productivity. By rethinking office furniture layouts, companies can unlock new levels of efficiency and teamwork.

Understanding the Relationship Between Space and Behavior

The way people move through a space influences how they interact with one another. In a traditional office, rows of cubicles and closed-door offices often create silos, limiting spontaneous conversation and cross-functional collaboration. While these layouts may offer privacy, they can also hinder the free flow of ideas. On the other hand, open-plan offices encourage visibility and accessibility but can sometimes lead to distractions and noise.

Striking the right balance requires an understanding of how different teams work. Creative departments may thrive in open, flexible environments where brainstorming happens organically. Analytical teams might need quieter zones for focused tasks. The key is to design a layout that supports both collaboration and concentration, allowing employees to choose the setting that best suits their needs at any given moment.

Zoning for Purposeful Interaction

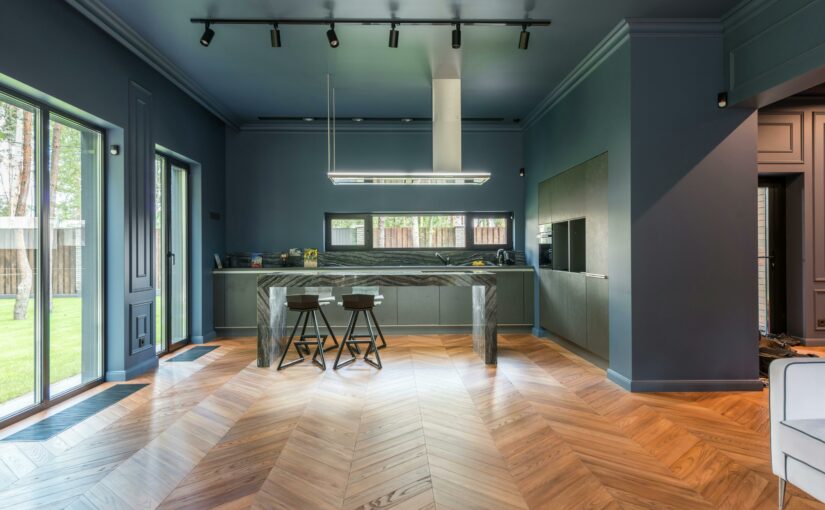
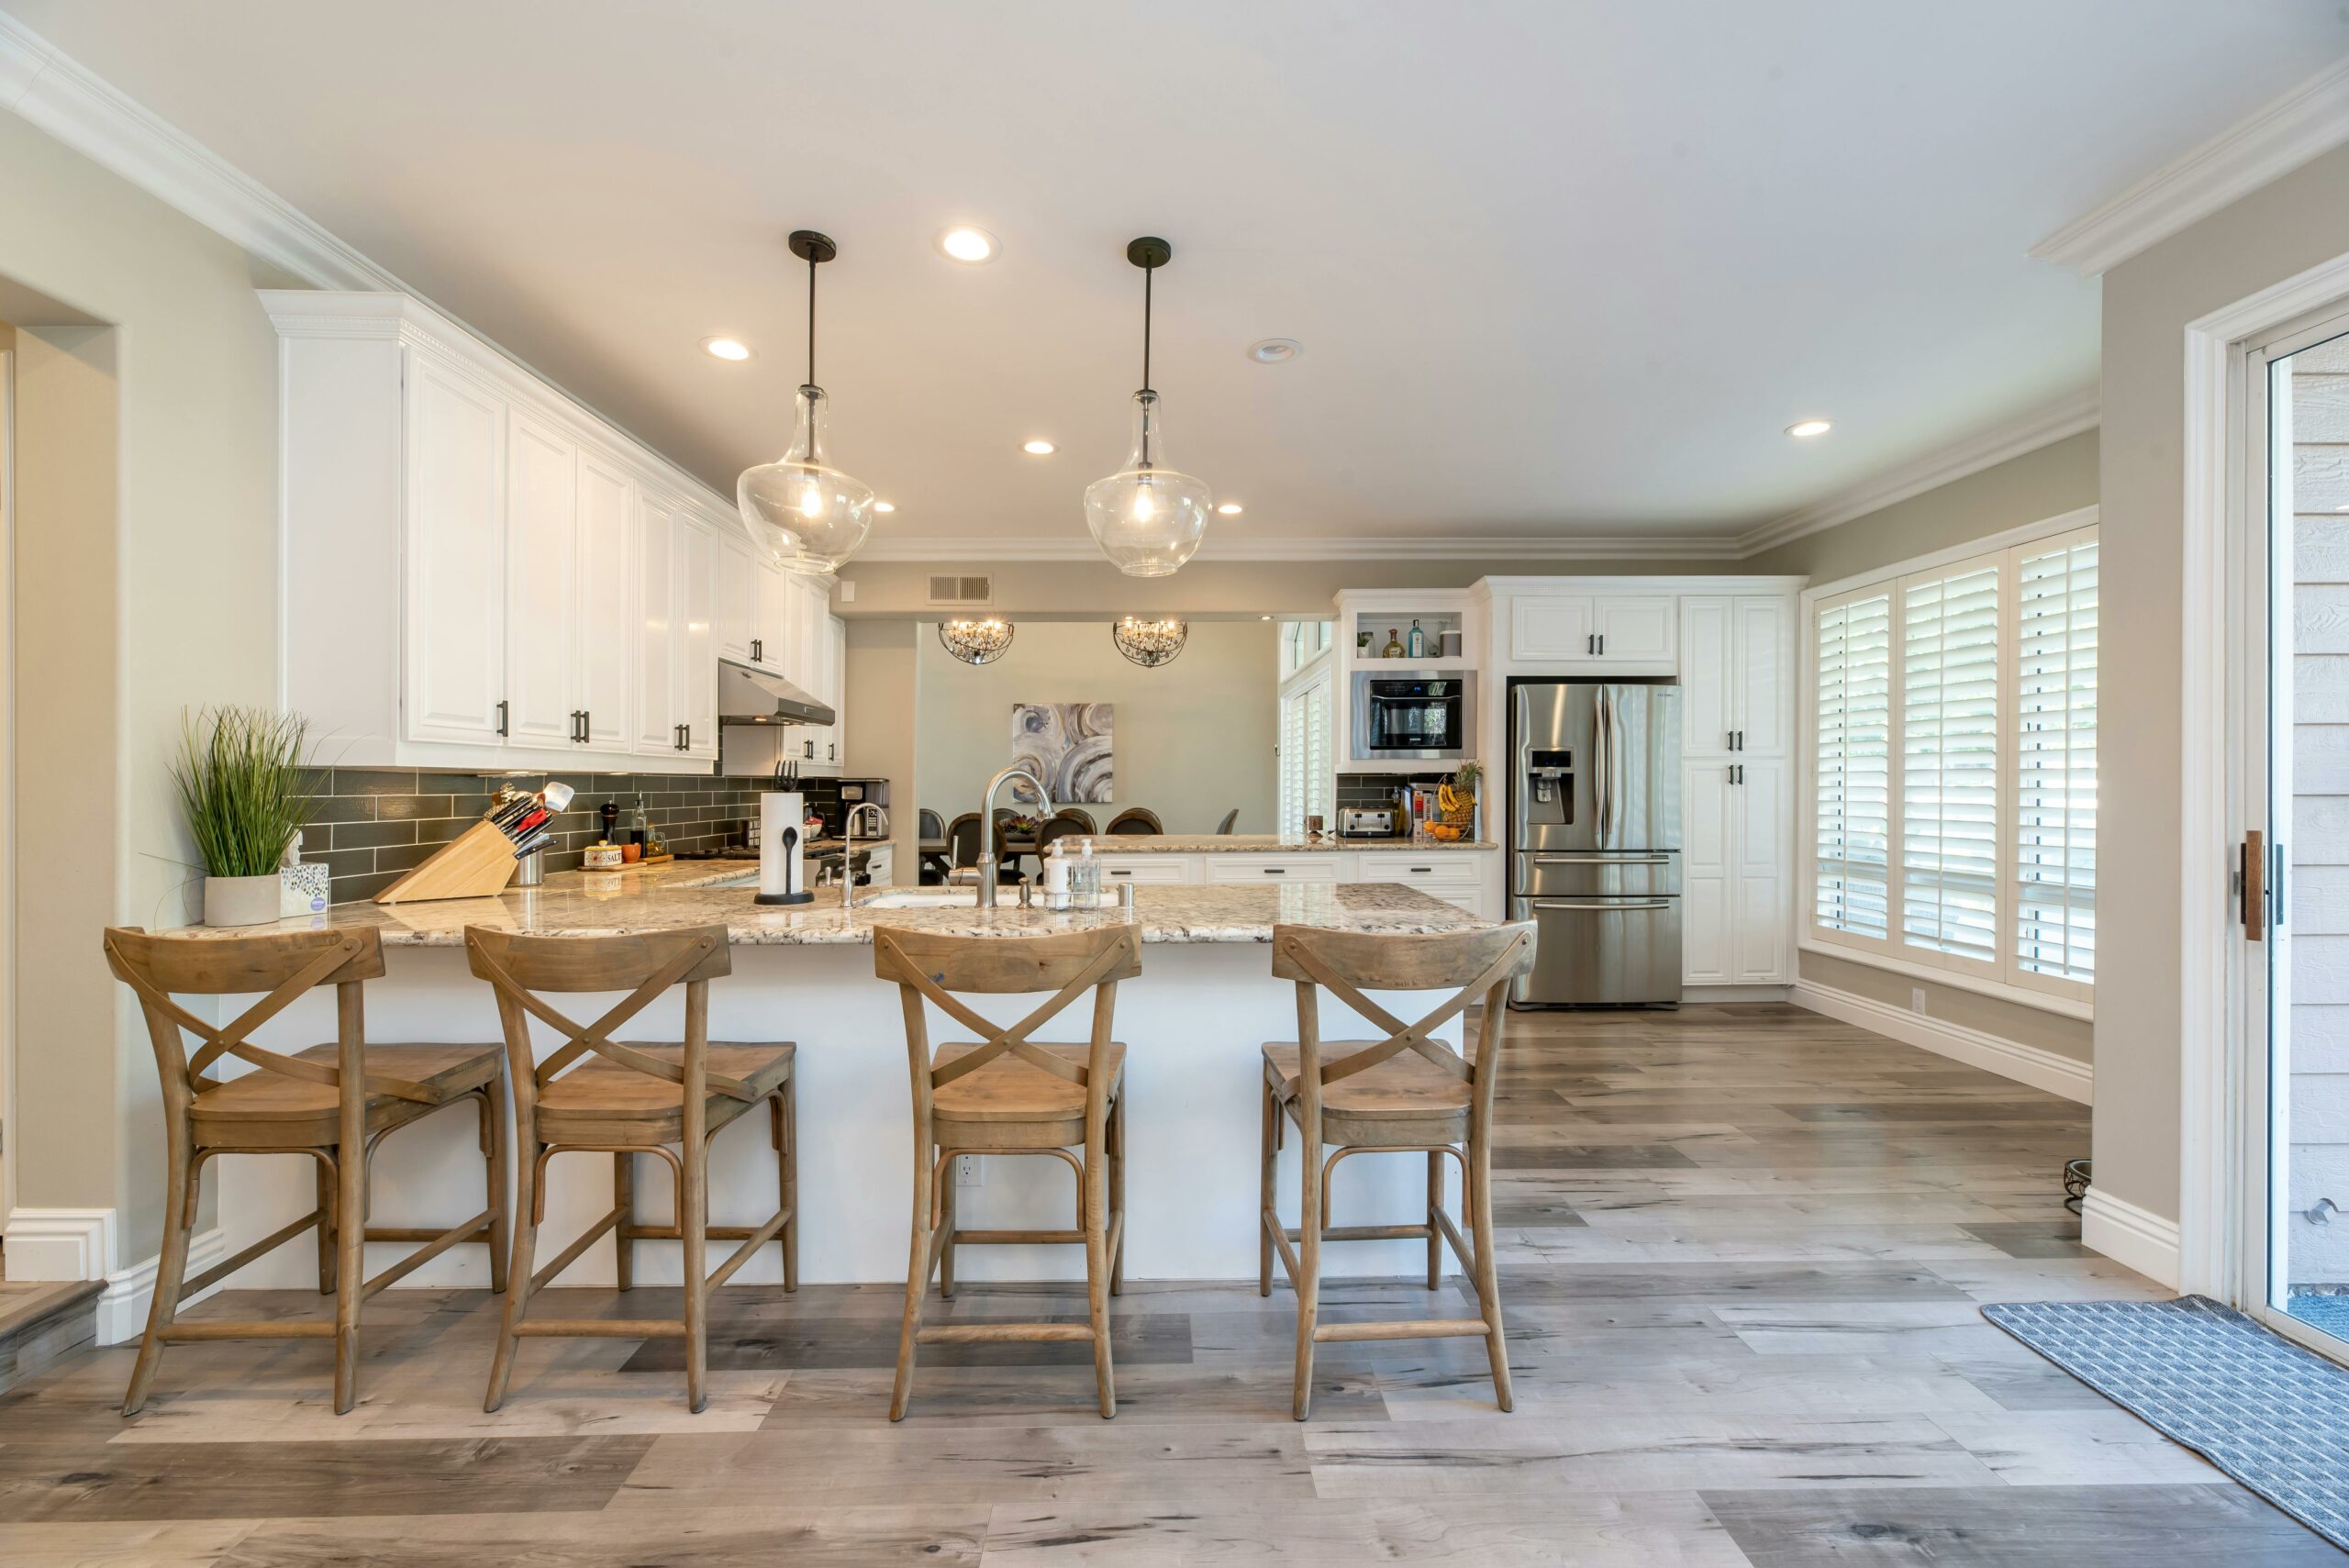
One effective strategy for improving workflow is to create distinct zones within the office. These zones can be tailored to specific activities, such as focused work, group meetings, casual conversations, and relaxation. By clearly defining these areas, companies can guide behavior and reduce friction. For example, placing collaborative furniture—such as round tables, whiteboards, and modular seating—in central locations encourages team members to gather and share ideas. Meanwhile, positioning individual desks near windows or quieter corners supports deep work and personal productivity.

The transition between zones should be smooth and intuitive. Pathways should be wide enough to accommodate movement without disruption, and visual cues like lighting, flooring, or color can help delineate spaces. When employees understand the purpose of each area, they are more likely to use it effectively, leading to better communication and workflow.

Flexibility as a Design Principle

Modern work is dynamic, and office layouts should reflect that. Fixed furniture arrangements can quickly become outdated as teams grow, projects shift, and priorities evolve. Incorporating flexibility into the design allows companies to adapt without costly renovations. Mobile desks, reconfigurable partitions, and lightweight seating make it easy to rearrange spaces based on current needs.

Flexibility also empowers employees to take ownership of their environment. When individuals can adjust their workstations or move to different zones, they feel more in control and engaged. This autonomy fosters a sense of trust and respect, which in turn enhances collaboration. A layout that accommodates change is not just practical—it’s a signal that the organization values innovation and responsiveness.

Encouraging Informal Collaboration

Not all collaboration happens in scheduled meetings. Some of the most valuable exchanges occur spontaneously—in hallways, lounges, or over coffee. Designing for these informal moments can have a profound impact on workflow. Comfortable seating areas, standing tables, and communal nooks invite casual conversation and quick problem-solving.

These spaces should be strategically placed to maximize visibility and accessibility. Near entrances, break rooms, or high-traffic corridors, they become natural gathering points. The furniture should be inviting but not overly plush, striking a balance between comfort and functionality. When employees feel welcome to pause and connect, collaboration becomes a natural part of the workday.

Integrating Technology Seamlessly

Technology is an integral part of modern collaboration, and furniture layouts must support it. Meeting areas should include integrated screens, power outlets, and connectivity options. Desks should accommodate multiple devices, with cable management systems that reduce clutter. Acoustic panels and soundproof booths can enhance virtual meetings by minimizing background noise.

The goal is to make technology feel like a seamless extension of the workspace. When employees can easily access tools and communicate without technical barriers, workflow improves. Furniture should not only support physical comfort but also digital efficiency. A well-designed layout anticipates these needs and incorporates them from the outset.

Reflecting Culture Through Design

Office furniture layout is also a powerful expression of company culture. A collaborative layout signals openness, transparency, and teamwork. A more segmented design may reflect a focus on individual performance and privacy. By aligning the physical space with organizational values, companies reinforce their identity and create a sense of belonging.

This alignment can influence recruitment, retention, and morale. Prospective employees often form impressions based on the office environment. A layout that feels thoughtful and intentional suggests that the company cares about its people and their experience. Existing employees are more likely to feel proud of their workspace, which enhances engagement and loyalty.

Conclusion: Designing for Connection and Flow

Improving collaboration and workflow through office furniture layout is both an art and a science. It requires a deep understanding of how people work, communicate, and move through space. By creating zones for different activities, embracing flexibility, encouraging informal interaction, integrating technology, and reflecting culture, companies can design environments that support their teams in meaningful ways.

The right layout doesn’t just make an office look good—it makes it work better. It turns furniture into a tool for connection, creativity, and progress. In a world where collaboration is key to innovation, thoughtful design becomes a strategic advantage. When space is designed with purpose, workflow becomes effortless, and collaboration thrives. Discover innovative workspace solutions tailored to your business needs at corporateofficeint.com —where design meets functionality.

Top Ways to Keep Workers Safe from Electrical Hazards at Work

You know electricity powers almost everything on site, yet a single mistake can turn an ordinary shift into an emergency. 

Before you dive into cables, panels, or power tools, you need clear practical habits that shield everyone from shocks, arcs, and burns. 

Insights like those shared on IOSCM show that prevention is less about gadgets and more about everyday decisions you control.

Inspect Tools with Fluke

Before every shift, give your meters, probes, and leads the same respect a pilot gives a pre-flight checklist; tiny defects can create huge shock hazards later.

  • Look for cracks in meter casings, melted insulation, or bent prongs that signal a tool no longer offers its rated protection from live energy.
  • Confirm category ratings remain readable; smudged CAT markings mean the meter may have seen more than its share of arc energy and needs replacement.
  • Use the self-test feature on advanced Fluke models to verify internal fuses and circuitry are intact before exposing the meter to jobsite voltage.
  • Match accessories carefully; mixing generic leads with a Fluke meter can defeat the manufacturer’s safety engineering and invalidate third-party certifications.
  • Document findings in a shared log so the next technician instantly knows whether a particular meter is cleared for service or tagged out for repair.

Consistent inspections build a culture where workers trust their instruments, concentrate on troubleshooting, and confidently head home because preventive habits keep dangerous surprises off the clock.

Safely Unplug Milwaukee Equipment

Cutting power might seem obvious, yet many injuries occur while yanking a cord; slow down, follow procedure, and treat the plug like a live conductor until proven otherwise.

Release Stored Energy First

Allow spinning blades, grinding wheels, or capacitors to coast to a complete stop before touching cords; residual motion can restart motors the instant contacts separate.

Grip the Plug, Not the Cord

Pulling by insulation stretches internal strands, creating hot spots that arc under load; train hands to pinch the molded plug body and pull in a straight line.

Verify Zero Voltage

After disconnection, test terminals with a non-contact detector to confirm no back-feed exists from portable generators, battery packs, or adjacent circuits under maintenance.

Maintain Distance Near Lines

Overhead conductors kill workers every year; respecting approach boundaries keeps your body out of the invisible envelope where electricity can arc through humid air.

  • Know the limits; OSHA Table A mandates minimum 10-foot clearance from 50-kilovolt lines, increasing with higher voltage or conductive boom extensions.
  • Use spotters to monitor crane jibs, ladder tips, or scaffold rails that move unpredictably while you focus on the immediate task below.
  • Plan travel paths; map equipment routes before sunrise, marking danger zones with cones or paint so operators cannot drift too close during turns.
  • Lower materials horizontal whenever possible; vertical rebar bundles, pipe, or antenna masts act like lightning rods craving an unwanted connection to energized circuits.
  • Pause in wind; a sudden gust can push tarps, poles, or lifts into prohibited space, turning a safe margin into a flashover tragedy.

Distance costs nothing yet buys the priceless guarantee that electricity looks elsewhere for a path when work proceeds beneath energized transmission infrastructure.

Avoid Circuit Overloads

Tripped breakers are warning flares, not annoyances; chronic resets mean wiring runs hotter than designed, an arc-flash precursor the Electrical Safety Foundation International urgently highlights.

Read the Warning Signs

Flickering lights, warm plates, and buzzing receptacles reveal branch circuits begging for relief; log each symptom to identify patterns indicating specific panelboard weaknesses.

Balance the Load

Relocate portable heaters or high-draw chargers to underused circuits; distributing amperage evens thermal stress and extends conductor insulation life dramatically.

Upgrade Protection

Install Arc-Fault Circuit Interrupters recommended by ESFI; these devices sense dangerous signature patterns and cut power before a smoldering fault ignites combustible dust.

Add More Capacity

When extension cords multiply, call a licensed electrician to add receptacles or a subpanel; permanent infrastructure beats improvisation every time in safety, efficiency, and code compliance.

Ground Systems per Schneider

A well-designed grounding scheme redirects fault current, stabilizes voltage, and slashes arc-flash energy; ignoring it is like building skyscrapers without foundations.

Select the Right Method

Solid-grounded, resistance-grounded, or ungrounded topologies each offer unique protection and continuity traits; match systems to process criticality and expected fault profiles.

Measure Impedance Regularly

Ground resistance rises with corrosion and soil dryness; periodic fall-of-potential tests confirm electrodes still sink lightning and fault currents below hazardous touch voltage thresholds.

Coordinate Protection Devices

Proper grounding works hand-in-glove with relays, fuses, and breakers; selective settings isolate the faulted feeder while keeping healthy sections energized for production.

Document and Label

Accurate one-line diagrams and clearly stenciled terminals prevent future crews from guessing where neutral points reside or how alternative sources bond during maintenance.

Watch for Wet Conditions

Water and electricity combine into an unpredictable assassin; every puddle, drip, or dew-soaked panel multiplies the danger of shocks and explosive short circuits.

  • Check forecasts and reschedule outdoor energization during storms; conducting testing in rain invites leakage currents that GFCIs might not clear fast enough.
  • Elevate cords on insulated hangers, stopping capillary wicking that travels inside jacket cuts and energizes metal tool frames far from the original spill.
  • Use IP-rated gear; enclosures verified through rigorous waterproof testing, like those detailed in industrial blogs, keep internal components bone-dry under jets or immersion.
  • Dry gloves matter; even insulated rubber loses dielectric strength when saturated, so rotate pairs and store backups in sealed bags inside climate-controlled trailers.
  • Ventilate spaces after wash-downs; humidity condenses on bus bars overnight, forming invisible films that track voltage across insulators at the next power-up.

Respecting moisture means anticipating it, engineering around it, and never assuming yesterday’s dry environment remains safe after weather or cleaning crews change the equation.

Post Brady Warning Signs

An unmistakable sign screams danger long before a worker’s tools touch energized gear; effective visual communication is your final defense when procedures slip.

Select Durable Materials

Choose rigid plastic or laminated vinyl rated for UV, chemicals, and abrasion so critical arc-flash data remains legible through years of wash-downs and sunlight.

Follow ANSI Z535 Formatting

Color-coded signal words, pictograms, and specific hazard statements guide quick decisions; standardized layouts let multilingual crews instantly grasp severity without translating lengthy text.

Place at Eye Level

Mount labels where hands naturally pause before opening doors; inside-only stickers fail to warn someone who never gets the chance to read concealed instructions.

Include PPE Boundaries

Arc-flash signs from trusted vendors list approach limits and required call ratings, letting electricians gear up properly instead of guessing acceptable protection thresholds.

Inspect Regularly

Replace faded, peeling, or obstructed signs immediately; a missing decal is a silent permission slip that can lead to a life-altering electrical incident.

Stay Shock-Aware

By applying these practical safeguards, you reduce the likelihood of shocks, fires, and costly downtime. If a site inspector issues an electrical defect notice, you’ll already understand the corrective steps because you have kept equipment checked, loads balanced, and work zones dry. Keep refining processes; complacency injures without warning sometimes.

The Science of Ventilation in Homes: Managing Humidity Without Running AC Constantly

Florida’s subtropical climate is a blessing and a challenge at the same time. On Marco Island, heat and humidity are a concern that goes on year-round. Hence, ventilation in the area is not only about cooling. The ventilation process in the region includes managing moisture, maintaining comfort when air conditioning cannot run nonstop, and preventing mould and mildew formation. 

This blog provides in-depth information on how smart ventilation systems and design can help your home breathe better. 

Why you cannot depend on the air conditioning system alone?

As a part of the cooling cycle, your air conditioner removes moisture from the indoor air. But in high-humidity settings, the capacity of the air-conditioner gets lower. So, the device is overwhelmed. In Florida, humidity levels are quite high. Normally, the level remains above 60%. This creates ideal conditions for mould, mildew, and mistiness to develop over time. 

Many homeowners in Marco Island run the air conditioner continuously to beat the humidity. The process is inefficient, and it strains the system badly. In such a situation, it is important to design a proper ventilation strategy. It can help share the load, even when the system cycles off. 

Overall house dehumidification – guaranteed comfort 

A whole-house dehumidifier integrates with your HVAC ductwork to remove excess moisture continuously throughout your home. Custom home builders Marco Island do not rely on isolated portable units anymore. The whole-house dehumidifier maintains indoor humidity at a relatively sweet spot—typically between 40-50%.

In this system, the moisture gets removed before the air enters living spaces. Along with reducing condensation, the system restricts spore growth and musty smells. The efficiency of the air conditioner also improves as it doesn’t get stressed with the whole dehumidification work. During mild periods, the air conditioner can run in ‘dehumidify-only’ mode, when cooling is actually not needed. 

With this approach, interior air remains dry. However, be careful about system sizing and drainage. Top home builders can help you set up a capable HVAC setup. 

Natural ventilation and smart designs

Smart home ventilation is an important part of architecture. Make sure there is an enough cross-ventilation scope. It is necessary to position windows, vents, and louvers well. This allows easy air flow inside the property. When it is set up properly, the experience reaches a new level. 

Another way is to use clerestory windows, ceiling vents, and exhaust openings. This way, moist and warm air goes out of the rooms. Custom home builders like Goyaldevelopment.com can plan houses in Marco Island for maximum natural ventilation. You can seek ideas from others who have hired such entities in recent times. 

Final words

No single solution is sufficient to combat the problem of humidity and moisture handling in Marco Island. You have to try natural as well as effective ventilation techniques through devices like air conditioners or energy recovery ventilators (ERVs) to cycle air properly. Choose the process that best suits the Florida climate, making your home fresh and breathable.

Budget-Friendly Upholstery Cleaning Tips for Affordable Homes

Ever catch yourself staring at that coffee stain on the armchair, wishing you could zap it away without torching your paycheck? Whether you rent a studio or own a snug flat, smart, low-cost tricks can keep fabric fresh. 

And if you’re based near London, browsing practical guides like this piece on upholstery cleaning in Kensington can spark even more doable ideas for tackling everyday spills and smells.

Check The Care Tag

Before grabbing chemicals or steamers, pause to decode the tiny fabric tag hiding under cushions. Those single letters quietly tell the safest, cheapest route to spotless upholstery.

Spot the Tag

Slide your fingers along seams, under cushions, and behind skirts until the papery label appears. Missing tag? Match the fabric to an online swatch chart for clues.

Decode the Letters

“W” allows water-based products, “S” likes only solvents, “WS” welcomes both, while “X” screams vacuum only.

Test in Secret

Even with the right code, dab cleaner on a hidden corner first. A two-minute trial prevents permanent rings, color bleed, or fabric puckering later.

Thorough Couch Vacuuming

Regular vacuuming costs nothing yet saves serious money by reducing deep-set grime. A five-minute weekly pass prevents dirt from grinding fibers and shortening your sofa’s lifespan.

  • Use proper tools. Snap on the upholstery head and crevice wand so crumbs hiding in seams have nowhere to run.
  • Remove cushions. Tilt each one up, beat gently, and suck away dust bunnies collecting under the seat deck.
  • Work top to bottom. Start at the backrest, then arms, finishing on the floor to capture anything that falls.
  • Empty often. A half-full canister reduces suction, so dump debris midway for maximum power.

Follow the pros at Better Homes & Gardens and aim for a once-a-week routine; allergy sufferers may benefit from twice.

Budget Pre-Treat Solutions

Store-bought stain sprays add up fast. Mix pantry staples into powerful pre-treaters that rival pricey brands and keep your cleaning budget blissfully low.

  • Grease fighter: Combine one tablespoon of clear dish soap with two cups of warm water and a teaspoon of salt; dab greasy pizza drips before they set.
  • Odor neutralizer: Equal parts vodka and water misted lightly erases pet smells without perfume overload or residue.
  • Protein-stain lifter: Whisk one teaspoon of enzyme laundry detergent into a cup of lukewarm water; sponge onto milk, blood, or egg accidents.
  • Color-safe brightener: Stir one tablespoon baking soda into a cup of club soda for gentle fizzing action on dull armrests.

Always blot, never rub, and rinse with a damp cloth so no sticky soap invites fresh dirt later.

DIY Vinegar Cleaner

White vinegar costs pennies and tackles most everyday spots. Couple it with gentle soap for an eco-friendly solution that leaves upholstery brighter, not sticky.

Mix the Formula

Shake together one cup white vinegar, one cup warm water, and a teaspoon mild dish detergent in a spray bottle until suds appear.

Apply Strategically

Mist lightly over a two-foot section, wait sixty seconds, then blot with a microfiber cloth. Work in small zones to avoid over-saturation.

Neutralize Odors

After cleaning, sprinkle baking soda, let it sit twenty minutes, and vacuum. The powder absorbs lingering vinegar tang and trapped sofa smells.

Freshen Fabric Couches

Deep cleaning happens twice a year, yet fabrics still need mid-season refreshers. Quick upkeep keeps your couch photo-ready for unexpected guests and marathon movie nights.

Dry Brushing

Use a soft-bristle brush to loosen lint, pet hair, and surface dust. Gentle strokes lift debris without driving it deeper into threading.

Steam Burst

A handheld garment steamer revives crushed fibers and kills bacteria. Hold the head two inches away and move steadily to avoid water rings.

Pillow Flips

Rotate and flip loose cushions weekly. Even wear prevents permanent dips and preserves supportive foam longer.

Microfiber Maintenance Tricks

Microfiber’s tight weave repels spills yet shows greasy fingerprints. The fabric loves alcohol more than water, so treat accordingly for spotless, streak-free results.

Alcohol Mist

Fill a spray bottle with isopropyl alcohol, lightly coat stained zones, and scrub using a white sponge. Alcohol evaporates fast, preventing water stains.

Refresh the Nap

Once dry, rub the surface with a clean soft brush in circular motions. This fluffs flattened fibers and restores the signature suede-like feel.

Overnight Deodorize

Sprinkle baking soda before bed; vacuum in the morning. The porous powder traps odors without dampness, perfect for pet-friendly homes.

Condition Leather Economically

Leather needs moisture just like skin. Skip expensive boutique creams and craft a wallet-friendly routine to keep couches supple, crack-free, and richly colored.

Mild Soap Wipe

Dissolve a few drops of gentle dish soap in warm water, dampen a cloth, and sweep away surface grime. Dry immediately with a towel.

Olive-Oil Buff

Place a teaspoon of olive oil on a rag, massage into leather using circular motions, and buff dry. The oil nourishes without a greasy film.

Protect from Sun

Position furniture away from direct windows or hang sheer curtains. UV rays fade dye and accelerate drying, forcing premature professional restoration.

Wash Removable Cushions

Machine-washable covers are a gift to frugal cleaners. Proper handling avoids shrinkage, zippers ripping, and costly replacement cushions after one careless cycle.

  • Read labels. Choose gentle, cold water settings unless the tag approves warmer temps for disinfecting.
  • Zip up. Closing zippers prevents snagging and helps covers keep shape during spinning.
  • Use mild detergent. Five pumps of concentrated liquid clean thoroughly yet rinse out easily.
  • Air-dry flat. Tumble heat warps fabric; instead, reshape and dry over a rack for wrinkle-free results.

When fully dry, slide covers on slightly damp inserts; minimal moisture eases stretching and smooths stubborn wrinkles naturally.

Tackle Stubborn Stains

Some spots laugh at gentle cleaners. Arm yourself with targeted tactics that banish wine, ink, or pet accidents without wrecking fabric or emptying your wallet.

Protein Spills

Enzyme laundry spray breaks down vomit, blood, or baby formula. Let it dwell ten minutes, blot, then rinse with cool water for odor-free results.

Ink Marks

Dip a Q-tip in rubbing alcohol and trace the pen line outward. Replace swabs as color transfers to avoid spreading the stain wider.

Red Wine

Blot excess liquid, cover area with table salt to absorb moisture, vacuum after drying, then treat residue with club soda until bubbles stop.

Weekly Preventive Habits

Staying ahead of messes means less scrubbing later. Adopt quick rituals that fit busy schedules and keep furniture looking professionally cleaned year-round.

  • Crumb patrol: Hand-vac seats after snack time so debris never embeds.
  • Pet check: Brush animals daily to cut shedding that settles on fabric.
  • Rotate throws: Wash and swap blankets weekly; they catch spills before upholstery suffers.
  • Spot-treat fast: Address spills within fifteen minutes to prevent permanent dye transfer.

Combine these micro-tasks with seasonal deep cleans, and your budget-friendly home will still feel luxuriously fresh and guest-ready every single day.

Frugal Fabric Wins

You now possess practical strategies to keep upholstery clean without straining your wallet. Follow care labels, vacuum faithfully, treat spots promptly, and refresh fabrics regularly. Consistency is cheaper than rescue missions, so weave these habits into your weekly rhythm and you’ll extend furniture life, comfort, and appearance with minimal expense.

Tips to Sell Your Home Quickly and Profitably

Selling a home can be both exciting and challenging, especially when time is of the essence. Homeowners often struggle with finding the right buyers quickly while ensuring they get the best possible price. A strategic approach is essential to make the process smooth, efficient, and profitable.

From pricing your property competitively to presenting it in the best light, every decision can impact how fast your home sells. Understanding the market, highlighting your home’s strengths, and using modern marketing tools are key steps to attract serious buyers.

In today’s digital age, leveraging technology, such as videos and virtual tours, can give your property an edge. By combining traditional selling techniques with innovative strategies, homeowners can sell faster, reduce stress, and maximize profits. Following these proven tips will help you achieve a successful home sale efficiently.

Set the Right Price from the Start

Setting the right price from the start is one of the most critical steps in selling your home quickly and profitably. A competitively priced property attracts more buyers and generates stronger interest, often leading to multiple offers. Conducting a thorough market analysis, reviewing recent sales of comparable homes, and understanding local trends can help determine a realistic price. Overpricing your home may discourage potential buyers, prolong the selling process, and ultimately reduce your profit, while pricing too low can leave money on the table.

Working with a professional real estate agent can provide valuable insights into pricing strategies tailored to your market. Agents can evaluate your home’s unique features, suggest adjustments based on demand, and recommend an initial listing price that balances speed with profitability. Additionally, staying flexible and monitoring buyer feedback allows you to make timely price adjustments if necessary.

Enhance Your Home’s Curb Appeal

Enhancing your home’s curb appeal is essential to make a strong first impression on potential buyers. The exterior of your property is the first thing buyers see, and a well-maintained facade can create a sense of value and care. Simple improvements like fresh paint, trimmed landscaping, clean driveways, and manicured lawns can dramatically boost visual appeal. Adding inviting elements, such as potted plants, a new mailbox, or updated lighting, can also make your home more attractive. A polished exterior encourages buyers to explore further, increasing the likelihood of a quick and profitable sale.

Small but impactful upgrades can significantly influence a buyer’s perception of your home. Removing clutter, repairing damaged siding, and power-washing walkways or patios can make your property appear well-cared-for and move-in ready. Even minor touches like painting the front door or updating hardware can enhance the overall look.

Stage Your Home for Maximum Appeal

Staging your home effectively is a key strategy to attract buyers and help them envision living in the space. Proper staging highlights your home’s best features while creating a clean, organized, and welcoming environment. Start by decluttering rooms, removing personal items, and arranging furniture to maximize space and flow. Neutral colors and tasteful decor can appeal to a broader audience, making it easier for buyers to imagine their own belongings in the home. Thoughtful staging can increase perceived value, generate stronger interest, and often result in faster offers.

In addition to furniture placement, attention to lighting and small details can make a significant difference. Bright, well-lit spaces appear more inviting, so open curtains, add lamps, and consider updating fixtures for a modern touch. Minor upgrades, such as fresh paint, new cabinet handles, or updated lighting, can elevate the overall impression. 

Use Videos and Virtual Tours to Attract Buyers

Using videos and virtual tours is a powerful way to showcase your home and attract serious buyers quickly. High-quality video walkthroughs give potential buyers a realistic view of the property, helping them visualize living there without needing an in-person visit. Platforms like social media, real estate websites, and YouTube can amplify your reach, generating more inquiries. Tools like invideo, a versatile free video editor, allow you to create professional-looking home tours easily, even if you have little editing experience. Incorporating video marketing can significantly increase engagement and speed up the selling process.

Virtual tours also provide convenience and flexibility for buyers who may have busy schedules or live in different locations. By offering an immersive experience, you allow viewers to explore every room, layout, and feature of your home at their own pace. Combining video tours with clear descriptions, high-resolution photos, and interactive floor plans can make your listing stand out. Utilizing these digital tools strategically ensures more visibility, stronger interest, and ultimately a faster, profitable sale.

Market Your Home Strategically

Marketing your home strategically is essential to reach the right buyers and sell quickly. Start by creating high-quality listings on popular real estate platforms with clear, professional photos and engaging property descriptions. Utilize social media channels to expand your reach and attract a wider audience. Email campaigns targeted at potential buyers or local real estate networks can also generate leads. Highlight your home’s unique features, neighborhood benefits, and recent upgrades to make your listing stand out. A well-planned marketing strategy ensures your property gets maximum exposure, increasing the likelihood of faster offers and a profitable sale.

Working with a real estate agent can further enhance your marketing efforts. Agents bring expertise in pricing, promotion, and negotiation while leveraging their network to find qualified buyers. Consider combining traditional marketing methods, such as open houses and print ads, with digital strategies for optimal results. Monitoring engagement and adjusting your approach based on feedback can help refine your campaigns.

Be Flexible with Showings and Open Houses

Being flexible with showings and open houses is crucial for selling your home quickly. Accommodating potential buyers’ schedules, even on short notice, increases the likelihood of receiving offers. A clean, well-prepared home creates a positive impression during every showing, allowing buyers to focus on the property’s features rather than distractions. Hosting both in-person and virtual open houses can cater to a broader audience, including remote buyers, and maximize exposure. Flexibility signals to buyers that you are motivated to sell, which can encourage serious inquiries and faster decision-making.

Virtual tours and scheduled showings can also save time while maintaining accessibility. Offering evening or weekend appointments allows buyers with busy routines to view your home without inconvenience. Additionally, keeping the property tidy, staging it appropriately, and highlighting key features ensures each visit is impactful. 

Negotiate Smartly and Close Efficiently

Negotiating smartly is essential to ensure you get the best price for your home while keeping the sale on track. Carefully evaluate offers, considering not just the price but also contingencies, closing timelines, and buyer qualifications. Respond promptly and professionally to each offer, and be prepared to counteroffer strategically. Maintaining open communication with buyers and their agents helps build trust, making negotiations smoother and increasing the likelihood of a successful deal. Smart negotiation ensures that both parties feel satisfied, which can prevent delays and potential conflicts during the closing process.

Closing efficiently is equally important for a fast, profitable sale. Work closely with a real estate agent or attorney to ensure all documents are prepared accurately and deadlines are met. Address any inspection or appraisal concerns promptly and coordinate with lenders and title companies to streamline the process. 

Conclusion 

Selling your home quickly and profitably requires a combination of strategy, preparation, and effective marketing. From setting the right price and enhancing curb appeal to staging, leveraging videos, and marketing strategically, each step plays a crucial role in attracting serious buyers. Being flexible with showings and negotiating smartly ensures a smooth, efficient sale. By applying these proven tips, homeowners can maximize their property’s value, reduce time on the market, and achieve a successful, stress-free home sale.

From Budget to Luxury: Kitchen Renovation Costs Every Homeowner Should Know

Renovating a kitchen is one of the most impactful upgrades a homeowner can make. It’s not just about aesthetics—it’s about improving functionality, increasing home value, and creating a space that reflects your lifestyle. But before diving into design boards and appliance catalogs, it’s essential to understand the financial landscape. Kitchen renovation costs can vary dramatically depending on the scope, materials, and location. Whether you’re working with a tight budget or planning a high-end transformation, knowing what to expect can help you make informed decisions and avoid costly surprises.

Defining the Scope: What Are You Really Renovating?

The first factor that influences cost is the scope of the renovation. A minor remodel might involve repainting cabinets, replacing hardware, and updating lighting fixtures. A mid-range renovation could include new cabinetry, countertops, appliances, and flooring. A luxury remodel often means custom cabinetry, premium materials, structural changes, and top-of-the-line appliances. Each tier comes with its own price range, and understanding where your project falls is the first step in budgeting wisely.

A budget renovation typically focuses on cosmetic upgrades. It’s about refreshing the look without altering the layout or investing in high-end materials. Homeowners might keep existing cabinets but repaint them, swap out laminate countertops for butcher block or quartz, and install energy-efficient lighting. These changes can dramatically improve the look and feel of the kitchen without breaking the bank.

Mid-range renovations go a step further. They often involve replacing cabinets entirely, upgrading to granite or quartz countertops, installing new appliances, and possibly reconfiguring the layout for better flow. This level of renovation usually requires professional labor and may include plumbing or electrical work, which adds to the cost.

Luxury renovations are in a league of their own. They often start with a complete gutting of the space and include custom cabinetry, imported stone countertops, designer fixtures, and integrated smart technology. Structural changes like removing walls or adding windows are common, and the finishes are chosen for their quality and exclusivity. These projects require architects, interior designers, and skilled contractors, and the price tag reflects that level of expertise.

Breaking Down the Costs: Where the Money Goes

Cabinetry is often the single largest expense in a kitchen renovation. Stock cabinets are the most affordable, while semi-custom and custom options can significantly increase costs. Custom cabinets are built to fit your space perfectly and offer endless design possibilities, but they come at a premium.

Countertops vary widely in price depending on the material. Laminate is budget-friendly, while granite, quartz, and marble are more expensive. Installation costs also vary depending on the complexity of the job and the material’s weight and fragility.

Appliances are another major expense. Basic models are sufficient for most needs, but high-end brands offer advanced features, sleek designs, and superior performance. Built-in appliances and smart technology can add convenience and style but also increase the overall cost.

Flooring choices range from vinyl and laminate to hardwood and tile. Each material has its own price point and installation requirements. Durable, water-resistant options are ideal for kitchens, and the choice often depends on the homeowner’s priorities—whether it’s ease of maintenance, appearance, or longevity.

Lighting plays a crucial role in both function and ambiance. Recessed lighting, pendant fixtures, and under-cabinet lights can transform the space, but rewiring and installation costs should be factored into the budget.

Labor is a significant portion of any renovation budget. Skilled tradespeople such as electricians, plumbers, and carpenters ensure the work is done safely and to code. General contractors manage the project and coordinate the various professionals involved. Their fees are typically a percentage of the total project cost.

Regional Variations and Hidden Costs

Location plays a big role in renovation costs. Urban areas with higher living expenses tend to have higher labor and material costs. Permits and inspections may also be more expensive and time-consuming in certain regions. It’s important to research local requirements and factor them into your budget.

Hidden costs can derail even the most carefully planned renovation. Unexpected issues like water damage, outdated wiring, or structural problems often surface once demolition begins. Having a contingency fund—typically around ten to twenty percent of the total budget—can help cover these surprises without causing delays or compromising quality.

Return on Investment: Is It Worth It?

Kitchen renovations consistently rank among the top home improvements for return on investment. A well-executed remodel can increase property value, improve energy efficiency, and enhance daily living. Budget renovations may not yield the same resale value as luxury upgrades, but they can still make a home more appealing to buyers.

Luxury renovations, while costly, can elevate a home’s market position and attract discerning buyers. However, it’s important to balance personal preferences with market trends. Over-customizing a kitchen may limit its appeal, so working with a designer who understands both aesthetics and resale value can be beneficial.

Planning for Success: Budgeting and Timing

A successful Brooklyn kitchen remodeling starts with a realistic budget and a clear timeline. Begin by determining how much you’re willing to spend and prioritize your must-haves. Consult with professionals to get accurate estimates and create a detailed plan. Consider the timing of the renovation—some seasons may offer better availability of contractors or discounts on materials.

Communication is key throughout the process. Regular check-ins with your contractor, clear documentation, and flexibility can help keep the project on track. Whether you’re updating a cozy apartment kitchen or designing a chef’s dream space, thoughtful planning and informed choices will ensure a smooth renovation and a kitchen you’ll love for years to come.

Conclusion: Navigating the Cost Spectrum with Confidence

Kitchen renovation costs span a wide spectrum, from modest updates to lavish transformations. Understanding the factors that influence pricing—from materials and labor to location and scope—empowers homeowners to make confident decisions. Whether your goal is to refresh your space on a budget or indulge in a luxury remodel, the key is to align your vision with your financial reality. With careful planning, the right team, and a bit of flexibility, your dream kitchen is well within reach. When it comes to transforming your space with precision and integrity, Zicklincontracting.com stands out as the trusted name in expert renovation and construction solutions.